Showing posts with label photography. Show all posts

Wednesday, April 27, 2011

Composition and Seeing Shapes

photo by Carol Luallin

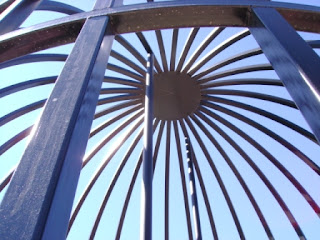
Each week the photography class finds one or two important controls on the camera we already own and use.  We learn something about the basic concepts of photography like aperture and depth of field.  We also concentrate on one of the visual elements.  For week two students looked around them for shapes and tried to use the rule of thirds.  

We have seen and accepted the unique shapes of things all of our lives, but have probably not thought a lot about it.  It's one of the things you start to notice when you're trying to learn to take better pictures.  Looking at the world through a viewfinder gives you some edges to contain your vision.  It gives you some boundaries to compare things to.  It makes you look at things in a different way. 

I encourage my students to change their pictures to black and white so that we're not distracted by all the shiny colors.  Lines and shapes and textures are often easier to emphasize without the color.  Save your original color file, change it to black and white and rename it, and you have both.  

Even if you don't have image editing software like PhotoShop, you can do basic cropping and editing in Picassa, which is free.  It's made by Google and is easy to find on the web.  Look at your world with new eyes, and share your vision with someone else.  You are an artist.

 photos by Jessica  Beethe

Tuesday, April 26, 2011

Littleton Photography Class 2011

I love teaching photography!  When I moved to Denver, and couldn't find a job teaching high school photography, one of the things I started doing was teaching a free photography class at my church.  This is the third year that I've offered the class, and even though our group is small, it has been fun.

Since I posted the basics of each lesson last year, this year I'm going to post student pictures and a few additional notes.

Jo Leasure took this photo as a homework assignment.  She was looking for lines.  She has reminded me that there are many people who are not necessarily new to taking pictures, but they are very new to digital photography.

 My children live and breathe digital technology.  They've never known life without it. I am always learning, and I feel a little behind, but to my parents, I seem like an expert.  One thing I love about photography is that you have to keep learning.  So now I learn new things about the art and soul of photography, but also about the technology.  I hope I can communicate some of that to my students.

So this year we have also talked about terms like pixel, resolution, byte, megabit and gigabyte.  We have also talked about all the online resources for learning about photography.  Have you seen how many tutorials there are on YouTube?  Amazing.  Check them out, and learn something new today.

photo by Amy Wiley

photo by Carol Luallin

Sunday, April 24, 2011

Photographing Your Own Children

I've heard several photographers say that the most difficult assignment is to photograph your own children. I think that may be true when the kids are small.  They get tired of being test subjects, and they aren't in awe of the photographer.  It gets better.  When your children are adults, they make great models!

Elyssa has a new haircut, and we did these portraits so she could have some new facebook pictures with her short hair.  I love her new look, and I really like these pictures, too.

Thursday, May 20, 2010

Session 4 Homework


This week as you look for subjects that showcase texture and color, look for:
1.  texture in nature
2.  man-made texture
3.  texture of skin, hair, fur or feathers
4.  saturated color  (bright, vivid, high chroma)
5.  subdued color (dull, more neutral, not as bright)
6.  monochromatic color scheme (one color, different values)
7.  cool colors (blues, greens, purples)
8.  warm colors (reds, oranges, yellows)

The world is full of color and texture, and aren't we glad!  Have fun as you notice these things in your daily life.


texture photograph by Janet Lemasters, 2010

Tuesday, May 11, 2010

Histograms

This is an example of a histogram.  Getting into the habit of checking your histogram as you shoot will help you see when you need to do a shot over again.  It is usually good to have some pixels all the way to both ends, and to have a majority of pixels somewhere in the middle.  But this is art, so whatever effect you're going for may look different from what I've just described.

High key images (mostly light values) will have the highest spikes toward the white end of the graph.  Low key (mostly dark values) will have the biggest spikes toward the black end.

Thursday, April 22, 2010

Littleton Photography Class - Session 3

Camera:  We practiced setting the shutter speed in manual mode, or finding shutter speed priority mode.  We found the control for the self-timer.

Terms:  stop - an increment of light.  The difference between a shutter speed of 15 ( one 15th of a second) and 30 (one 30th of a second) is one stop.  The difference between two adjacent apertures would also be called a stop.  Cameras in the 1800s had a piece of metal called a Waterhouse stop that determined the size of the aperture, and therefore how much light came into the camera.  You chose which stop to put into the camera based on how much light you wanted to come in.

A shutter speed of 15 lets in twice as much light as a shutter speed of 30.  A shutter speed of 60 lets in half of the light as a shutter speed of 30.

equivalent exposure- different combinations of apertures and shutter speeds will let in the same amount of light, but there are aesthetic reasons for choosing one or the other.  For example, if I start with an aperture of 8 and a shutter speed of 125, but I want to use a larger aperture for a shallower depth of field, I can change my aperture to 4.  That 's two stops more light.  Therefore, I have to change my shutter speed two stops to 500 to keep my exposure (the amount of light) the same.  If I start with f/8 and 125 again, and want to blur motion, I can change my shutter speed to 30.  Since I have changed my shutter speed to allow two stops more light, I must change my aperture to f/16 to keep the exposure the same.

Remember that aperture determines how large the opening is that allows light to come in.  It also controls depth of field.  Shutter speed determines how long the light strikes your image sensor, but it also determines how motion is recorded.

white balance - one of the properties of light is color.  We experience this every day, but perhaps have not really thought about it.  Morning light is cooler than evening sunset light.  Tungsten lightbulbs give off a warm, yellowish light.  Florescent bulbs give off a cool, greenish-blue light indoors.  Digital cameras have settings to compensate for these different colors of light.

 flash - an artificial light source.  Most cameras come with a built-in flash.  Your built-in flash is often not the best solution.  It produces a harsh light close to the camera lens that makes your subject look flat and without texture.  Often the subject is too bright and the background is too dark.  Accessory flash units that connect to a hot shoe on the top of your camera give much greater flexibility in intensity and direction of light, and can even be used off-camera. A wonderful web site for reading about off-camera flash is strobist.com.

Seeing:   This week, look for motion and light as you take your practice photos. Try to take both frozen action and blurred motion.  Give panning a shot.  Take both high key and low key photos, as well as a high contrast one.  Try a window lit, back lit, and reflection picture.  Have fun!

Motion photo by Carol Luallin        Dice photograph by Amy Parker

Rule of Thirds

An important tool for making your compositions work is called the rule of thirds.  It is also called the 9 zone grid.  If you divide the picture space into three even parts horizontally, then divide it again into three even parts vertically, you will have a grid like the one on the photo at the left.  Place the center of interest, the part of the photo you want the eye to go to first, at one of the intersections of the grid lines.  This works every time to make your compositions more interesting.  A bullseye may be great for darts, but can make your photographs boring and static.

Some cameras have a feature that places a 9 zone grid into your viewfinder as you are composing the shot.  This is a good way to practice until the rule of thirds becomes automatic and natural to you.

Thursday, April 8, 2010

Littleton Photography Class - Session 1

Welcome Photography students!  If you missed a class, or just want a review, you can find a shorter version of our class notes here.

On week 1 we looked at our cameras and instruction books to find our memory cards and battery compartments.  We found out how to format the memory card and recharge the  battery.  Everyone discovered whether or not their camera would allow manual settings or had an aperture priority or shutter priority mode.

Four important terms:
exposure - the amount of light in your picture
aperture - the size of the opening through which the light enters
shutter speed - the amount of time the light enters
ISO - in digital photography, a measure of the amplification of the information hitting your sensor
Aperture and shutter speed are the two most important factors determining your exposure.  ISO is next.

Seeing:  The most important factor in photography is not the equipment; it is the photographer.  Your eye, your heart, your mind are more important than anything else.  Yes, some people are gifted with a natural aptitude for seeing great photographs, but you can train your eye and your mind and become a better photographer.

Week 1 we looked for lines and perspective.  Lines are the easiest visual element to find, because they are everywhere!  Look for straight, curvy, and diagonal lines, lines that create direction, and lines that create structure.  Find some converging lines, linear patterns, and an example of aerial perspective as well as linear perspective.

If you don't have your instruction book, go to the manufacturer's web site and download one.

The photograph above is by Casey Etie.

Thursday, April 1, 2010

Taking Childbirth Photos

I've had a lot of questions about what camera and settings to use when taking childbirth photographs.  I used a Nikon D700 to take these.  The quality of photographs taken at higher ISO's is much improved over my previous Nikon camera.  I was able to use ISO's of 1600, 2500, even 3200 with good image quality.  Usually the hospital staff will ask that flash not be used.  With a camera like the D700 you can use high enough ISO settings that flash is not necessary.   I used shutter speed priority set on 60 so that I could hand hold.  It also helped that I have a f/2.8 lens.